SailNav. Search
SailNav. Help Index
Navigating the App - Getting Started
Welcome aboard! SailNav is your navigation tool designed to work totally OFFLINE. This ensures reliable operation on the high seas and in areas without coverage, as cartography and GPS do not consume data.
It is intended as a primary solution for smaller vessels without instrumentation or as an essential backup system for any boat size. Note: Only real-time information functions (Weather and AIS) will require network access to update.
Initial Setup: Preparing the Voyage
Before you start, go to the Settings menu to customize your app. Here you can define the language, boat name, units of measure, engine data, home port, and other important aspects.
It is also highly recommended to configure the Emergency section with local rescue and assistance phone numbers.
Additionally, it's the ideal time to familiarize yourself with two key tools: the Map Manager and the Alarm Manager. Knowing and configuring them before setting sail is a great advantage, as you will ensure you have all the necessary cartography downloaded for offline use and can establish a personalized surveillance system for your safety.
With everything ready, you'll be prepared to get the most out of SailNav and enjoy safe and reliable navigation.
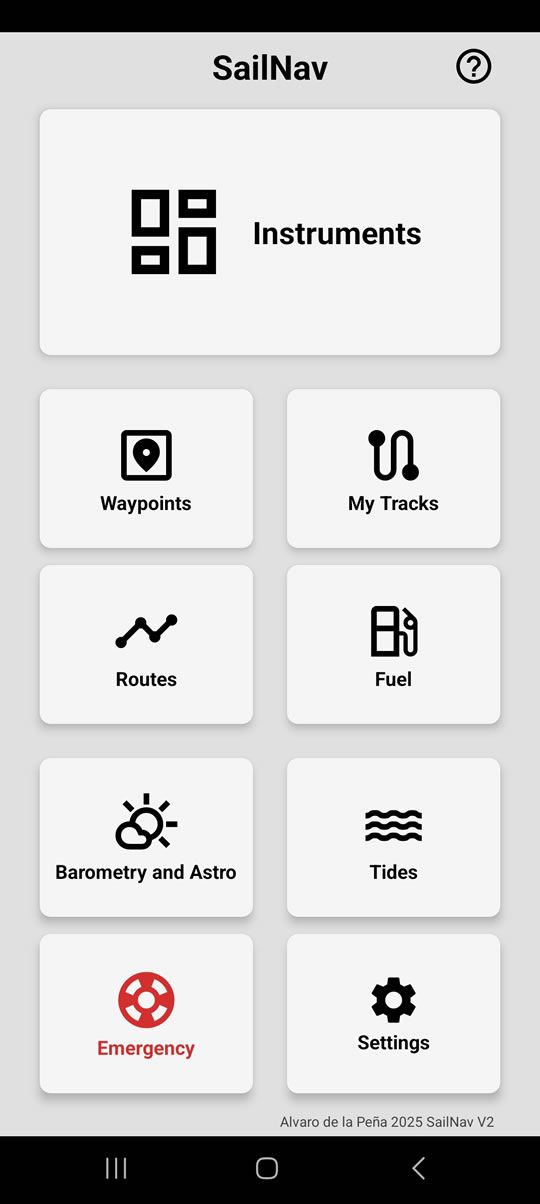
Instruments
The Instruments section consists of four different screens:
- Map and Routes → Initial screen when entering this section. Consult maps and define Routes and waypoints.
- Navigation → Compass and navigation/waypoints data.
- Instruments 1 → Configurable panel that allows you to fully customize which metrics, indicators, or navigation data you want to see on the screen.
- Instruments 2 → Second configurable panel same as above.
To move between screens there are two methods:
- Swipe sideways with your finger (horizontal scroll).
- Use the bottom navigation buttons (left/right arrow).
To exit the Instruments section and return to the main menu or previous screen, you can use:
- The Android system back button.
- The back button on the top bar (left arrow next to the title).
Alarms and Top Buttons
The top bar is designed to group and access safety functions and provide you with status information at a glance.

- MOB (Man Overboard): Immediate access emergency button. Its function is to mark the exact GPS position of the incident to start the return maneuver.
- Alarm Manager: This button is your alert control center. Pressing it opens the Alarm Manager panel, from where you can configure and activate Anchor, Heading, and your personalized voice alerts.
- Help (?): Gives you direct access to this user guide at any time.
- Fuel Gauge: Graphically shows the estimated fuel level. The icon changes color (from blue to red) as the tank empties. (See Fuel section).
- GPS Signal: Status icon indicating satellite reception quality. If you press it, you will access the GPS Info and Compass screen to see precision in meters.
Note on Alarm Volume
Important! For alarms to sound, two conditions must be met: the app's alarm volume (configured in the Alarm Manager or Settings) must be high, and your device's media volume must also be at an audible level.
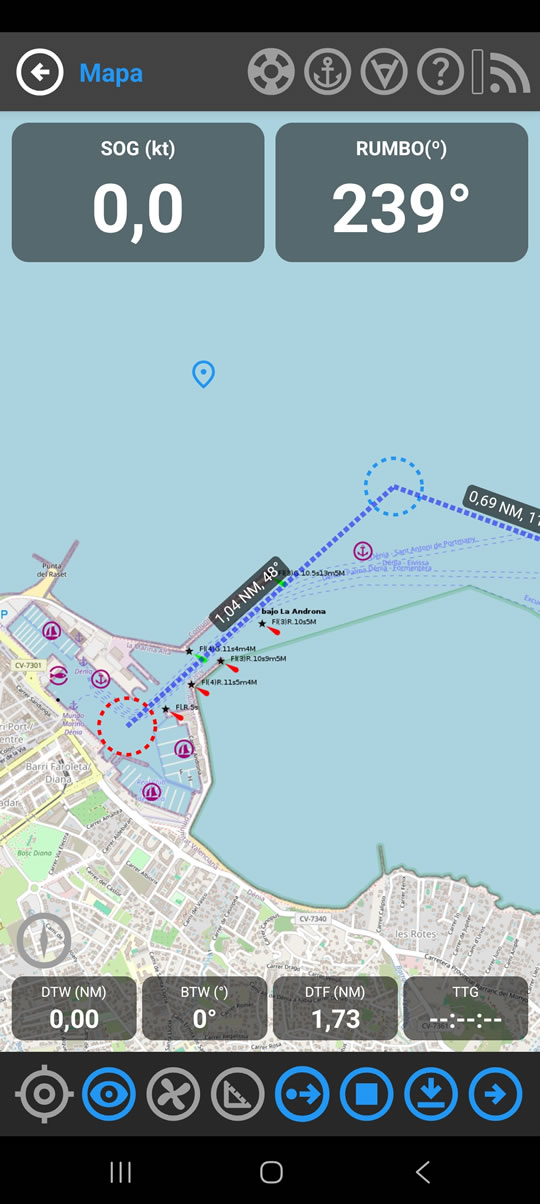
Maps and Routes
This is the main navigation screen of SailNav. From here you can visualize your position, heading and speed in real time, manage visual layers, consult weather and maritime traffic, and of course, plan your routes.
Side Toolbar
On the side of the screen you will find a dropdown arrow. When pressed, a toolbar opens with advanced visualization functions. From top to bottom, you will find:
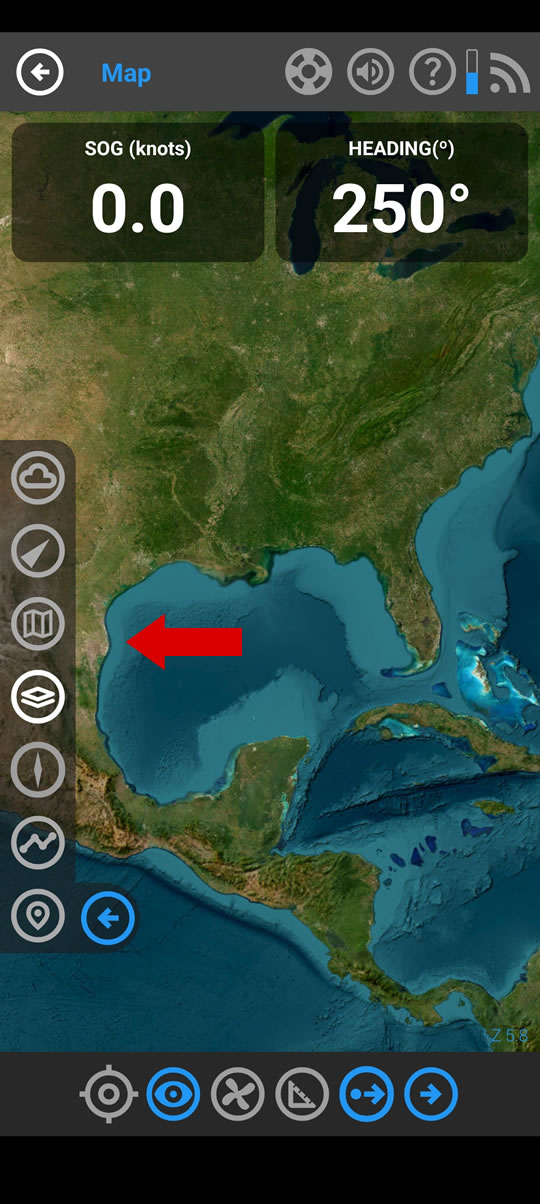
- 1. Weather (Clouds and Rain) (*): Activates the visualization layer for cloudiness and precipitation in motion. See details below.
- 2. AIS (Maritime Traffic) (*): Activates the visualization of other ships on the map. See details and colors below.
- 3. Map Manager: Direct access to your chart library. Here you can download new areas or manage existing ones. For more details, consult the Offline Map Manager section in Settings.
- 4. Layers (Base Map): Allows you to change the visual appearance of the map. You can choose between:
- OSM (Standard): Clear, high-contrast vector map, ideal for daytime navigation.
- Satellite: Aerial photographic view. Requires connection to load images if not cached.
- Dark: A low-brightness, high-contrast mode, designed not to dazzle during night navigation.
- 5. Map Orientation: Changes how the map behaves relative to your boat:
- North Up: The map is always fixed with North at the top.
- Head Up: The map rotates so your bow always points up.
- 6. Routes: Direct access to your personal library. From here you can load previously saved routes to navigate them or manage your collection. (See Routes section).
- 7. Waypoints: Direct access to your list of saved points. Useful for quickly selecting a destination ("Go to") or managing your points of interest. (See Waypoints section).
(*) Notice on Online functions: These functions (Weather and AIS) require network access (Internet) to obtain data. They are maintained free of charge as an extra complement, as long as data server costs allow.
Weather: Cloud and Rain Forecast
When the weather button is activated, SailNav overlays an animated layer on the map showing the forecasted movement of cloudiness and precipitation for the coming hours. This visual tool allows you to anticipate if a storm or rain front is heading your way.
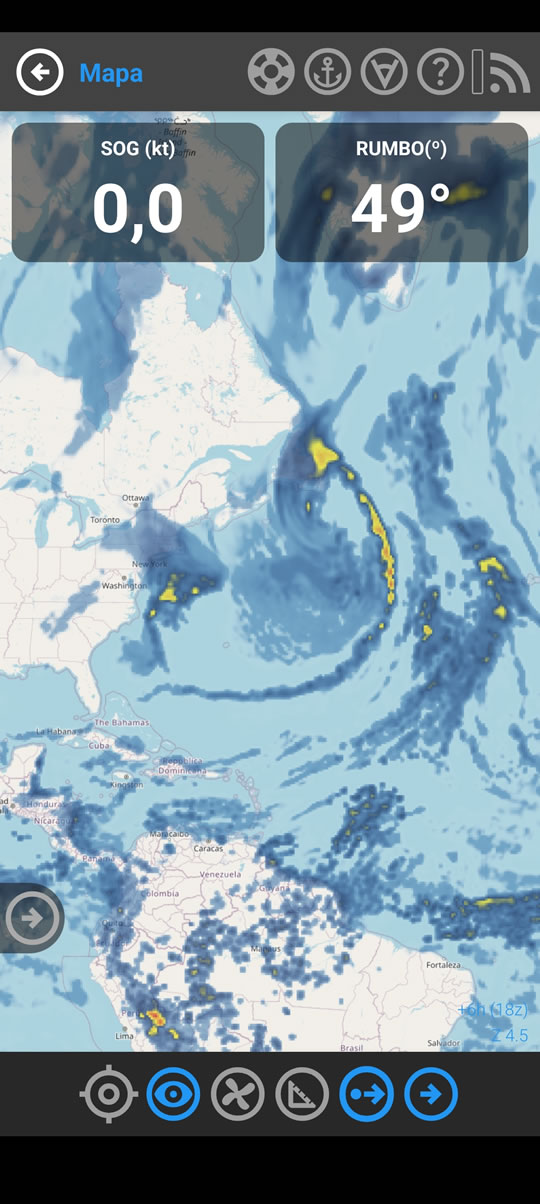
How to interpret it
The map is generated using SailNav's own algorithms and uses a color scale to indicate intensity:
- Blue/White Tones: Light cloudiness or weak rain.
- Yellow/Orange Tones: Moderate precipitation.
- Red/Dark Tones: Intense precipitation or storms.
ℹ️ INFORMATION NOTE
The meteorological information shown is for guidance only. It is a simulation based on prediction models and may not reflect sudden local changes.
Recommendation: Before setting sail and during the voyage, always consult official weather reports from local maritime authorities and use this function only as an auxiliary visual complement.
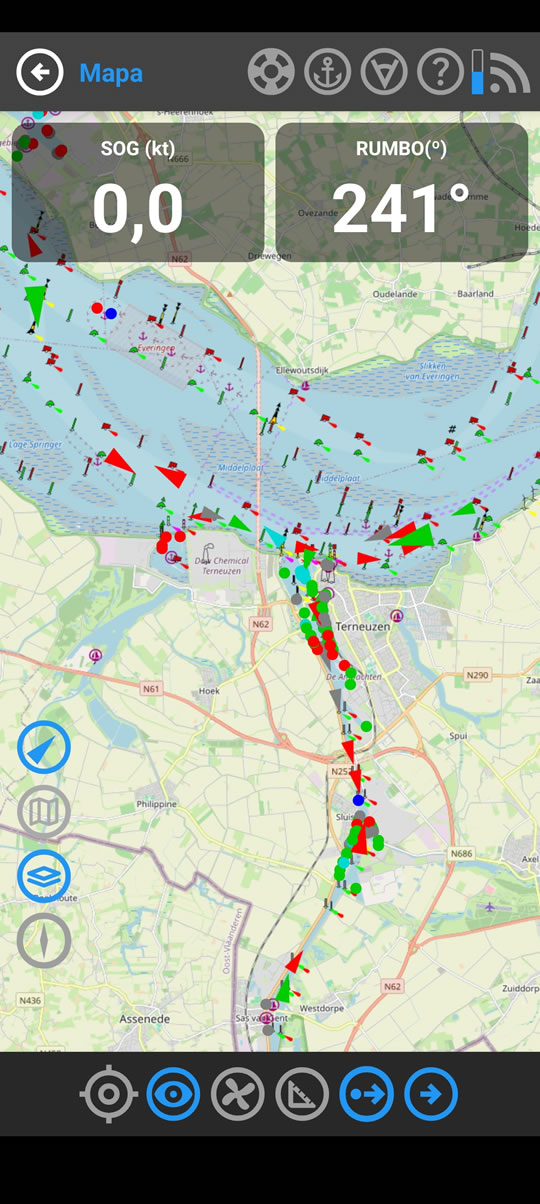
AIS (Automatic Identification System)
SailNav allows you to visualize real-time maritime traffic overlaid on your chart. This function is ideal for better situational awareness of the vessels around you.
Operating Requirements
- Network Connection: Unlike a radio receiver, this system obtains data from online servers. You need internet access on your device.
- Zoom Level: To avoid cluttering the screen, ships only appear when you zoom in (Zoom levels greater than 8). If you zoom out too much, the icons will be hidden.
- Free Service: Using this function has no additional cost in the app (subject to the availability mentioned above).
Visual Interpretation (Colors and Sizes)
To facilitate quick identification, ships are shown according to this color code:
- ■ Green: Passenger.
- ■ Electric Blue: Fishing.
- ■ Red: Search & Rescue and Medical.
- ■ Orange: Tankers.
- ■ Yellow: Cargo.
- ■ Dark Blue: Authority, Police or Military.
- ■ Purple: Pleasure and Sailing vessels.
- ■ Pink: High Speed Craft (HSC).
- ■ Cyan: Special and Work (Tugs, Pilots, Dredgers, etc.).
- ■ Gray: Other or Unknown type.
In addition to colors, the graphical representation provides more information:
- Icon Size: The icon you see on the screen corresponds to the proportional size of the real ship. This helps you visually distinguish a small sailboat from a large cargo ship.
- Transparency (Old Data): If you see a ship drawn semi-translucent (transparent), it means its position has not been updated recently. Exercise extra caution with these targets, as their real position could have varied significantly.
⚠️ IMPORTANT SAFETY WARNING (AIS)
This is NOT a radio-frequency (antenna) AIS system. Information shown is obtained via internet and may suffer delays (latency) of several minutes relative to the actual position of vessels. Furthermore, not all ships transmit AIS or may not be captured by the satellite/terrestrial antenna network.
NEVER use this function as the sole tool to avoid collisions. Always maintain proper visual and auditory lookout and use radar or radio-certified AIS equipment for critical safety decisions.
Route Creation and Editing
Creating a route in SailNav is an intuitive and flexible process. You don't need to enter a separate editor; you do it all directly on the map.
Create a New Route
- Add the first point: Simply tap on the map where you want to start your route or where your first destination is. There is a bottom button to define if the origin is the boat (usual) or the first marked point (for planning from home).
- Add more points: Keep tapping on the map. The route line will be drawn automatically.
- Navigation activated!: As soon as you add the first point, navigation activates and the panels show information (DTW, BTW...).
Modify an Active Route
- Move a point: Long-press a point and drag it without releasing.
- Insert a point: Simply tap on the route line between two existing points.
- Delete a point: Simply tap directly on the point to be deleted.
Saved Waypoints
In addition to temporary points, you can create permanent Waypoints by long-pressing on the map. To use one in your route, tap its icon and select "Add to route" via a long press on the card.
Bottom Toolbar
Each icon gives you quick control over a specific map function.

- Center Map: Centers the map on your boat's current position and activates tracking.
- Route Origin: Toggles between your boat or the first manual point as the route start.
- Show/Hide Track: Activates or deactivates the visualization of your wake ("track").
- Measurement Mode: Tool to measure distance and bearing between two points (A and B) without creating a route.
- Hide Panels: Shows or hides the top indicators (SOG/Heading).
- Stop Route: Cancels and clears the active route.
- Save Route: Saves the current route in memory for future use.
- Next Screen: Go to Navigation.
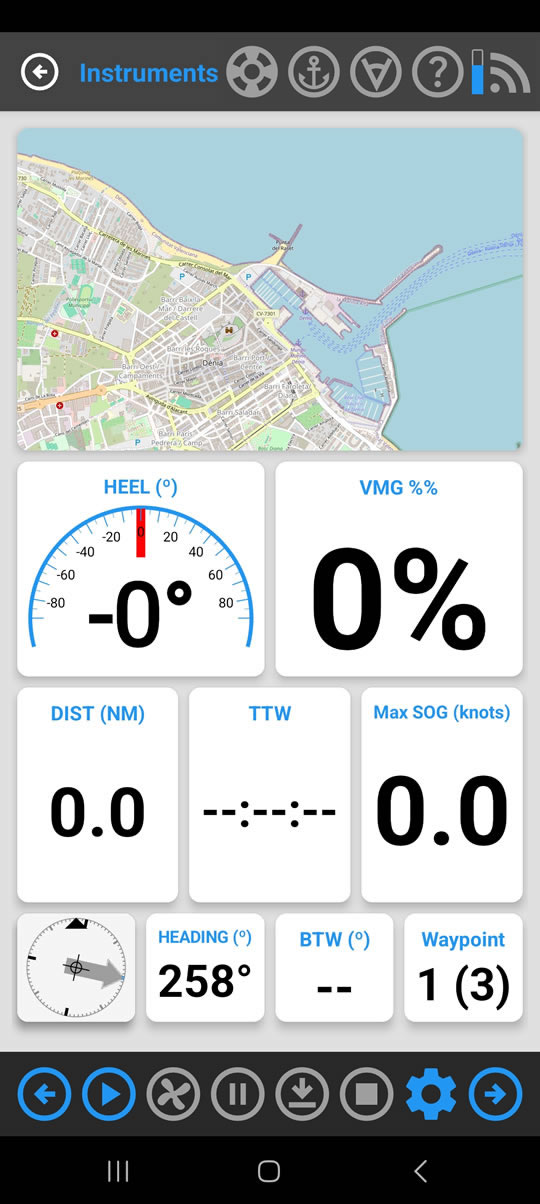
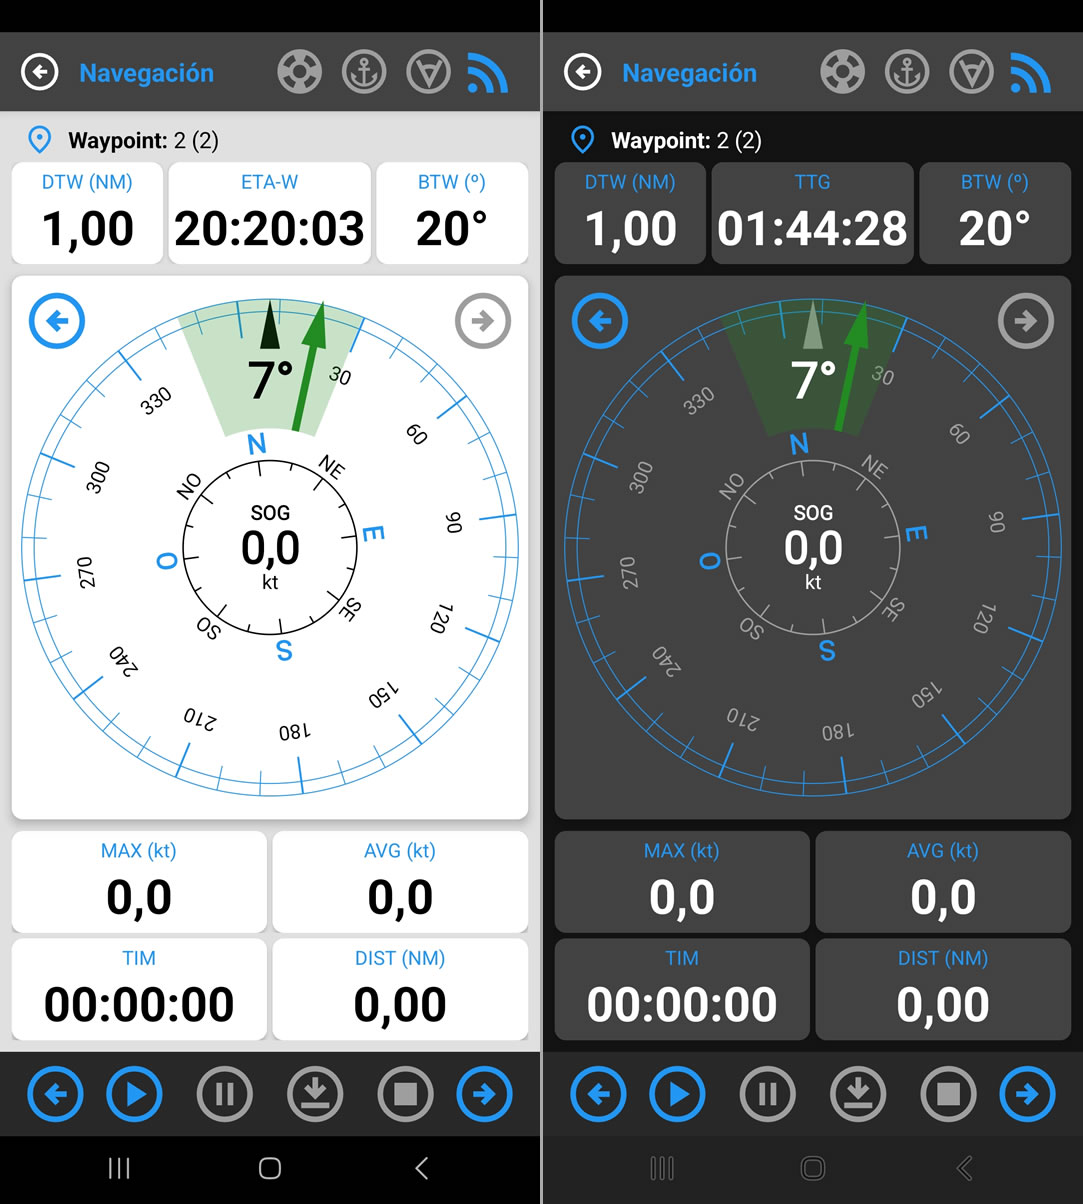
Navigation: Your Digital Compass
This screen is your main compass and one of the control centers during active navigation. It is designed to provide important information at a glance, allowing you to maintain the correct heading and monitor your voyage data in real time.
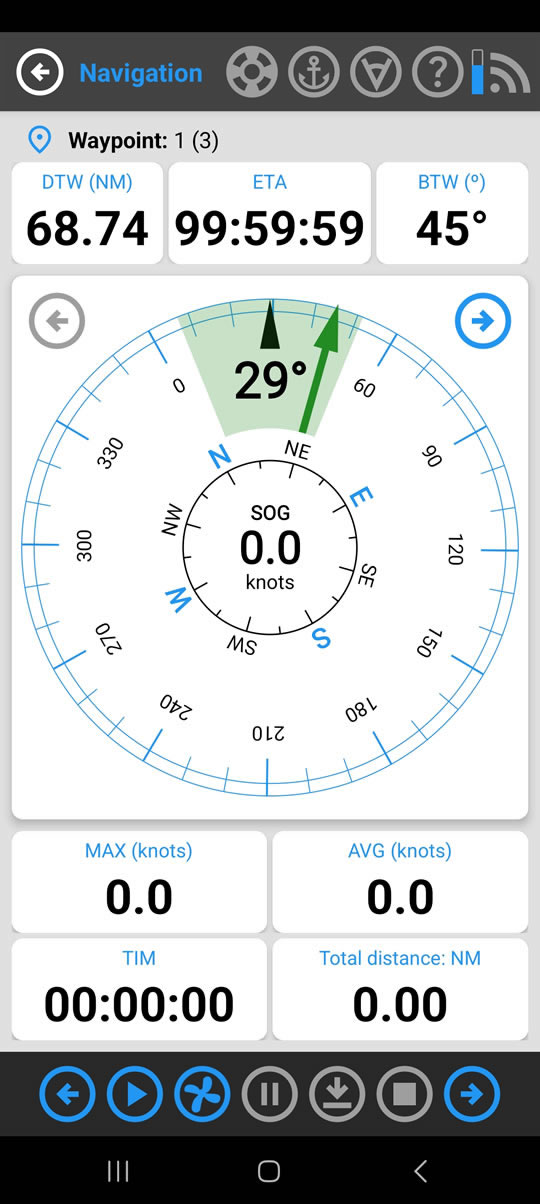
Screen Anatomy
Route Panels (Top)
This information only appears when you have an active route.
- Waypoint: Indicates which point on the route you are heading to (e.g., "1 of 3").
- DTW / DTF: Shows the distance to the next point. If you press this panel, it will change to show the total remaining distance to the end of the route.
- Interactive Time Panel: Pressing this panel alternates between time calculations:
- ETA: The Estimated Time of Arrival (e.g., 16:30h) at your final destination.
- TTG: The Time To Go (e.g., 2h 15m) to reach your final destination.
- ETA-W: The Estimated Time of Arrival (e.g., 14:50h) at your next waypoint.
- TTW: The Time To Waypoint (e.g., 0h 25m) to reach your next waypoint.
- BTW (Bearing to Waypoint): The theoretical bearing you should follow to reach the point.
The Intelligent Compass
It is the heart of this screen. It offers the essential information to maintain heading.
- The large number is your current heading (COG).
- Heading Indicator (Arrow and Sector): The arrow always indicates the heading to follow (BTW), and its color warns you if you are on the right track:
- Green Arrow: Good heading! Your current direction is within the green tolerance sector.
- Red Arrow: You have deviated. You must turn until your heading enters the green sector again.
- The center shows your speed. By default, it is your SOG, but if you press the value, you can alternate between:
- SOG: Your actual Speed Over Ground.
- VMG: Velocity Made Good (the speed at which you are directly approaching your destination).
- VMG%: Your VMG performance, showing your efficiency.
Voyage Panels (Bottom)
Show statistics for your current trip, since you pressed "Play".
- MAX: Maximum speed reached.
- AVG: Average speed.
- TIM: Voyage stopwatch.
- Total distance: Total distance covered.
Navigating a Route
When a route is active, you can use the arrows on the sides of the compass to manually change the destination waypoint.
Bottom Toolbar
The bottom bar allows you to manage your voyage recording, control the engine, and navigate between instrument screens.

- Left Arrow: Returns to the Map and Routes screen.
- Play: Starts (or resumes) voyage recording.
- Engine ON/OFF: Press this button to record when you start or stop the engine. This allows the app to calculate consumption and range. The icon lights up blue when the engine is ON.
- Pause: Temporarily stops the recording and stopwatch.
- Save: Saves the current voyage in the My Saved Tracks section.
- Stop: Stops recording and resets all counters to zero.
- Right Arrow: Advances to the Instruments 1 screen.
Configurable Instrument Panels
SailNav offers two fully customizable instrument screens: Instruments 1 and Instruments 2. The idea is that you can dedicate each screen to a different type of information organized to your needs (headings, times, racing, cruising, fishing, fuel, sail or engine).
Each panel is a grid that you can design as you like, displaying up to 24 different metrics per screen. Between the two panels, you can have up to 48 indicators at your fingertips!
How to Configure a Panel
From the Instruments 1 or 2 screen, follow these steps:
- Press the gear icon on the bottom toolbar.
- The "Panel Configuration" window will open to design the structure.
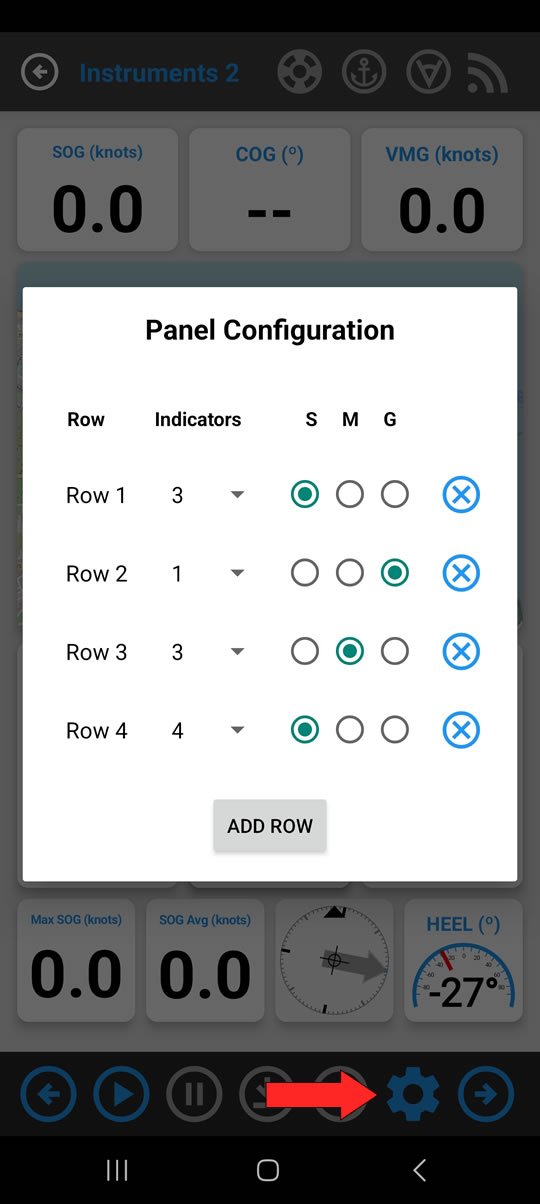
- Rows: The panel is organized by rows. Add new ones with "ADD ROW" or delete them with (X).
- Indicators: In each row, choose how many data points you want to display (from 1 to 4).
- Size (S, M, L): Assign a size to each indicator: Small (S), Medium (M), or Large (L).
How to Select Data
With your grid created, tap on one of the empty boxes. A list will unfold with all available metrics for you to choose which one to display in that space.
Available Metrics Index
Here is a summary of all the data you can add to your panels, organized by category:
- Speed and Heading
- Navigation and Route
- Time Management
- Performance (VMG)
- Fuel and Engine
- Voyage Data
- Visual Instruments
| Metric | Abbreviation | Description |
|---|---|---|
| Speed and Heading | ||
| Speed Over Ground | SOG | Your actual speed over the seabed. |
| Course Over Ground | COG | Your actual track (direction of movement) over the seabed. |
| Magnetic Heading | HEADING | The magnetic heading your boat's bow is pointing to (requires sensor). |
| Maximum Speed | MAX | Maximum speed reached during the current voyage. |
| Average Speed | AVG | Average speed of the current voyage. |
| Navigation and Route | ||
| Active Waypoint | WAYPOINT | Shows active waypoint number and total (e.g., "1 (3)"). |
| Distance to Waypoint | DTW | Straight-line distance to the next route point. |
| Distance to Finish | DTF | Total cumulative distance to the final route destination. |
| Bearing to Waypoint | BTW | Heading you must take to go directly to the next point. |
| Distance to Land | DTL | Distance to the nearest coastline. |
| Time Management | ||
| Current Time | TIME | Displays current device time. |
| Time to Waypoint | TTW | Estimated time to reach the next point. |
| ETA Waypoint | ETW | Clock time at which you will reach the next point. |
| Time to Finish | TTF | Total estimated time to complete the route. |
| ETA Finish | ETF | Estimated clock time of arrival at final destination. |
| Performance (VMG) | ||
| Velocity Made Good | VMG | Effective speed of direct approach to destination. |
| Efficiency | EFIC | Percentage of VMG efficiency relative to your actual speed. |
| Fuel and Engine | ||
| Fuel Bar | FUEL BAR | Visual graph of fuel level. |
| Fuel Percentage | FUEL % | Numerical percentage remaining in tank. |
| Fuel Quantity | FUEL QTY | Estimated amount of fuel (L/Gal). |
| Range (Distance) | RNG (DIST) | Estimated miles you can cover with current fuel. |
| Range (Time) | RNG (TIME) | Remaining navigation hours at current engine rate. |
| Theoretical Consumption | CONS (TEO) | Consumption based on configured engine curve. |
| Real Consumption | CONS (REAL) | Calculated real-time consumption. |
| Fuel Efficiency | ECON | Miles per liter/gallon (Fuel economy). |
| Voyage Data | ||
| Distance Traveled | DIST | Odometer for the current voyage. |
| Stopwatch | TIM | Time elapsed since the start of the voyage. |
| Visual Instruments | ||
| Heel | HEEL | Digital inclinometer (Heel angle). |
| Mini Compass | COMPASS | Simple digital compass. |
| Nautical Rose | ROSE | Graphic rose with visual indicators for heading and waypoint direction. |
| Mini Map | MAP | Detailed view of the navigation map (Cartography). |
Bottom Toolbar
This control bar allows you to manage voyage recording, control the engine, and move between screens.

- Left Arrow: Returns to the Navigation screen.
- Play: Starts or resumes voyage recording.
- Engine ON/OFF: Press this button to record when you start or stop the engine. This is key for the app to calculate consumption and range. The icon lights up blue when the engine is ON.
- Pause: Pauses recording.
- Save: Saves the recorded voyage in My Saved Tracks.
- Stop: Stops recording and resets data.
- Settings (Gear): Opens the window to customize this panel's grid.
- Right Arrow: Advances to Instruments 2 (from Instruments 1) or returns to map (from Instruments 2).
Waypoints
A waypoint is an individual geographic point that you save because it has a special interest: your port, your favorite destination, a cove, a fishing spot, a dangerous rock, etc.
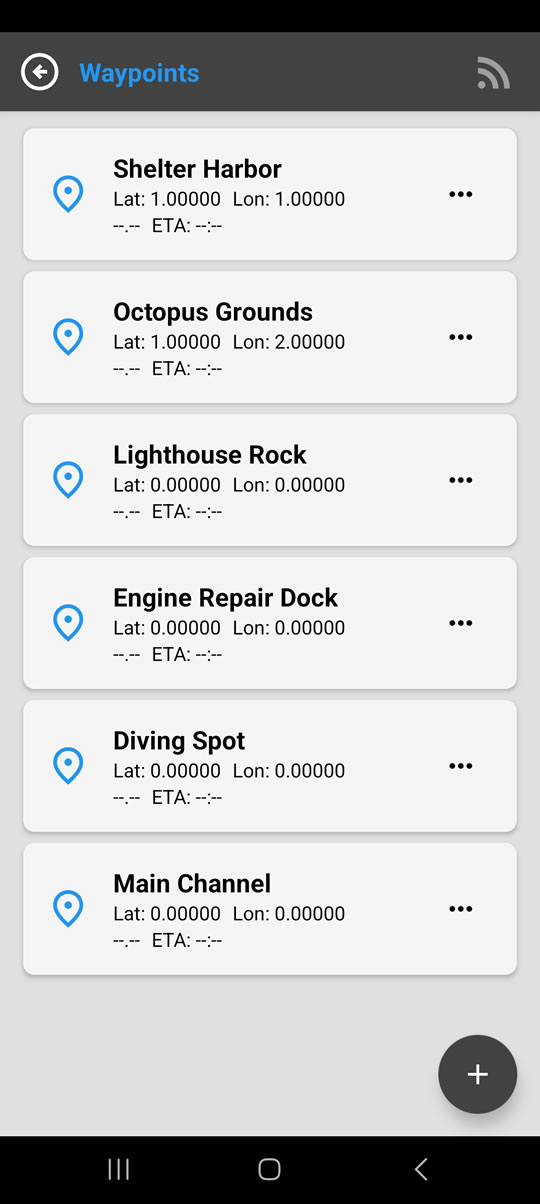
How to Create a Waypoint
There are two ways to add a new waypoint to your list:
- From the Map: Long-press on the exact spot on the map you want to save.
- Manually: Press the floating button (+) to enter a name and coordinates.
To facilitate data entry, you can choose between two formats: Decimal Coordinates or Nautical Coordinates. You can also use your current location.
How to Use Your Waypoints
- Navigate to a Waypoint ("Go to"): Tap any waypoint in the list to activate direct navigation towards it.
- Add to a Route: On the Map, saved waypoints appear with their own icon. You can tap them and add them to a route.
- Manage Waypoints: Press the (...) icon to Edit waypoint information or Delete it.
Routes
This section is your personal route library. All paths you've created from the Map are saved here, keeping your frequent trips, harbor approaches, or favorite fishing runs handy.

What can you do here?
- Load a Route: Tap on a route to load it onto the map and start navigating.
- Manage Your Routes: Press the (...) icon to open a menu with more options, such as Rename or Delete.
Usage Tips
- Save the approach route to your home port to navigate safely at night or in bad weather.
- Had an incredible fishing day? Save the route with a name like "Trolling Bream Sept." to repeat it.
My Saved Tracks
This section is your digital navigation logbook. All voyages you have recorded are stored here, allowing you to analyze and relive your navigations with unprecedented detail.
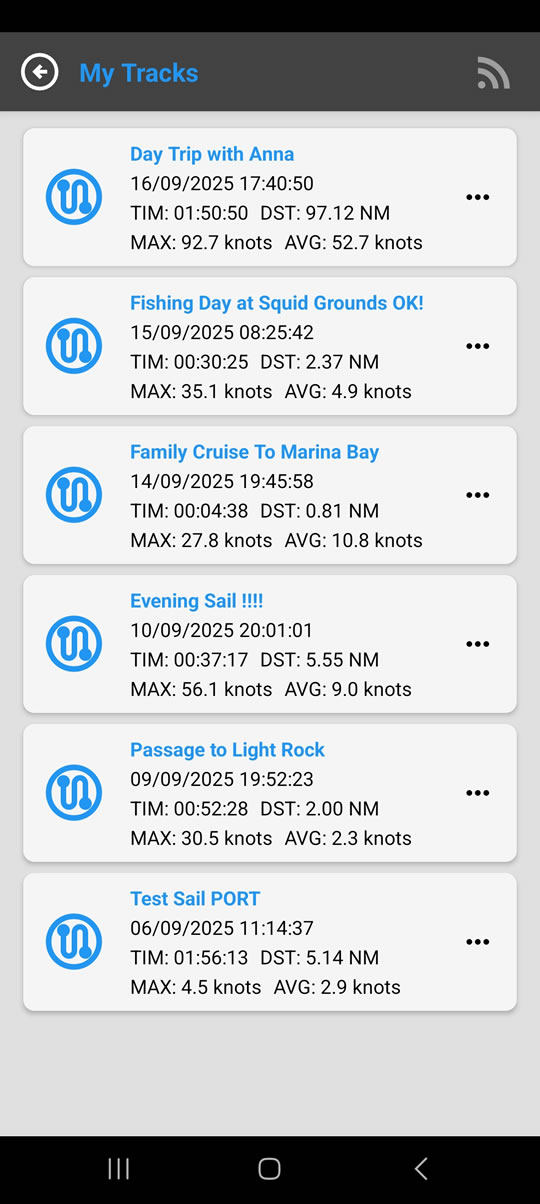
Key Difference: Routes vs. Tracks
It's very simple: Routes are the plan (future) and Tracks are the record of what you have done (past). You design a Route to follow it, whereas a Track is the automatic recording of the path you actually took.
Analyzing a Saved Track
When you tap one of the tracks in the list, a detailed analysis screen opens where you can:
- Visualize the Path: See the exact track you followed, drawn on a map and differentiating between sail and engine.
- Manage the Track: Change the name of the saved track or delete it permanently.
- Consult Detailed Statistics: The app automatically breaks down your trip metrics, distinguishing segments done under sail from those under engine. For each mode (sail and engine) you can see:
- Total time of use.
- Distance traveled.
- Average speed.
- Maximum speed reached.
Fuel and Engine
This section is your control center for fuel management. Its goal is to offer an estimate of consumption and remaining fuel level, especially useful for vessels that lack a physical gauge, and as a verification system for those that do.
Through simple questions about refueling and internal algorithms that combine your engine data (configured in Settings) and the real usage you record with the Engine ON/OFF button, SailNav can predict your range and help you decide if you need to refuel before reaching your destination.
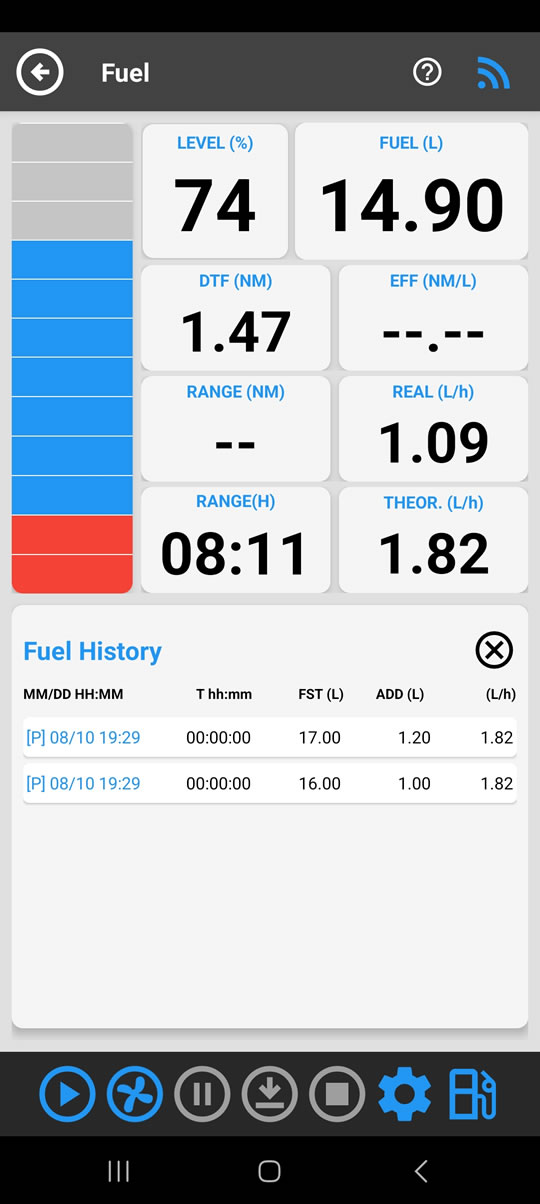
Main Indicators
- LEVEL (%): Estimated percentage of fuel remaining in your tank.
- FUEL (L): Estimated amount of remaining fuel in liters.
- DTF (NM): Distance remaining to reach the end of your active route.
- EFF (NM/L): Your current fuel efficiency, measured in nautical miles per liter. Helps you find the most economical cruising speed.
- RANGE (NM): Estimated distance range you can cover with remaining fuel.
- REAL (L/h): Actual hourly consumption your engine is currently having.
- RANGE (H): Estimated time range if you maintain current engine rate.
- THEOR. (L/h): Theoretical hourly consumption of your engine, based on data you entered in settings.
Fuel History
This table shows a record of your operations: refueling, resets, and calculated consumption in each segment, allowing for detailed tracking.
Low Level Alarm
For your safety, the app will automatically trigger a visual and audible alarm when estimated fuel level drops below 17%.
Bottom Toolbar

- Play / Pause / Stop / Save: Controls for voyage recording, working the same as in other screens.
- Engine ON/OFF: The key button in this section. Press it to tell the app when you start and stop the engine. It is vital to record its use for calculations to be accurate.
- Settings (Gear): Takes you to Settings so you can enter or modify engine and tank data.
- Refueling History: Opens a screen where you can view and manage your entire refueling history.
DISCLAIMER: All metrics in this section are theoretical estimates. Their precision depends directly on correct configuration of engine data and disciplined recording of engine use and refueling, as well as specific sea state conditions, boat condition, and engine status. SailNav is not responsible for decisions made based on this information. The skipper is solely responsible for safety and proper fuel management on board.
Barometry and Astronomical Info
This section provides atmospheric pressure data to anticipate weather changes, as well as detailed information about the sun and moon.
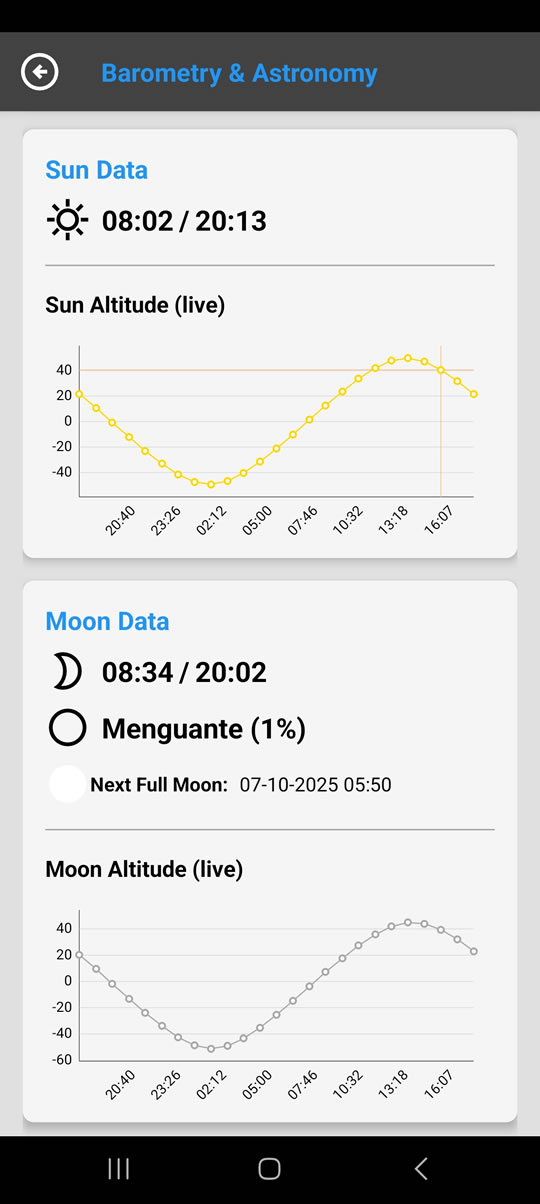
Barometric Pressure
A sudden drop in pressure usually indicates approaching bad weather. Note: This function requires your device to have a built-in barometric sensor.
Sun and Moon Data
You will find sunrise/sunset and moonrise/moonset times, current moon phase, and next full moon date, along with their altitude graphs.
Upcoming Improvements
We are working to improve this section and will soon include a complete Tides section!
Tides
This section provides a graphical tide prediction for any point you select on the map, an essential tool for planning harbor entries, anchoring, or fishing days. Note that as an app that does not require internet access, the data provided are approximate and for informational purposes only. Always consult official tide tables and local nautical charts.
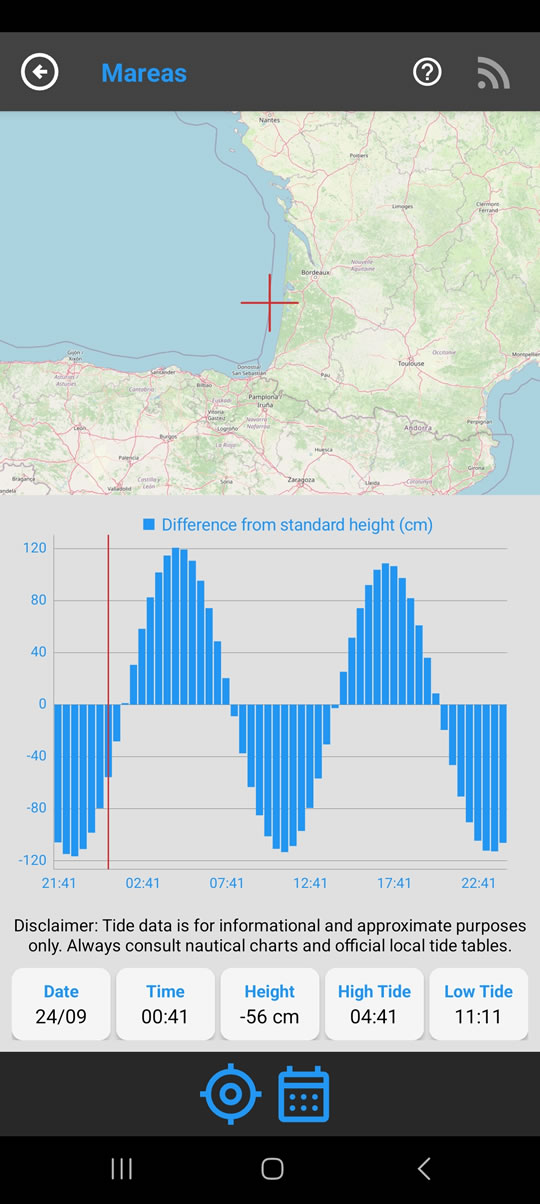
How It Works
- Select a Point: Tap directly on the map. The red cross will indicate the selected point and the bottom graph will update with tide predictions for that location.
- Tide Graph: Shows tide height variation throughout the day. The vertical red line indicates current time.
- Key Data: In the bottom panels you can see the graph's date and time, the difference over the current standard, and the time of the next high and low tide.
Toolbar

- My Position (GPS): Press this button to get tide predictions for your current location.
- Calendar: Allows you to select a future date to check tide predictions for other days.
Disclaimer: Tide data are approximate and for informational purposes only. Always consult official tide tables and local nautical charts.
Safety Center (Emergency)
This section gives you quick access to the most important tools in a critical situation. Configure it before setting sail!
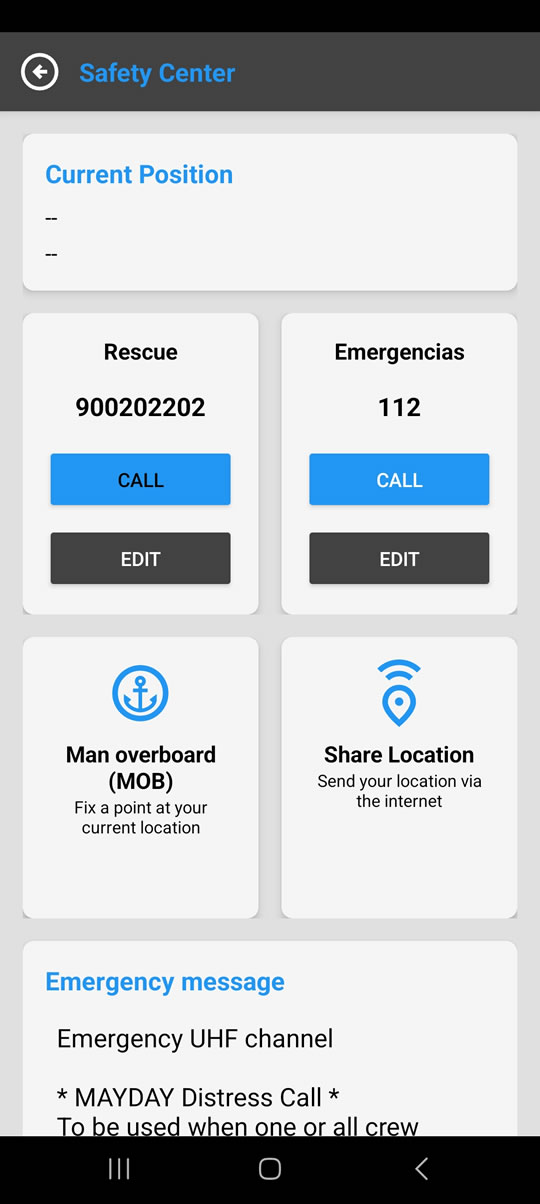
Available Functions
- Current Position: Displays your exact GPS coordinates to communicate them to rescue services.
- Emergency Calls: Direct call buttons to Maritime Rescue (editable) and 112.
- Man Overboard (MOB): Instantly marks the GPS position of the incident and activates direct navigation to that point.
- Share Location: Sends your position to a contact via WhatsApp, SMS, etc. (requires connection).
- Emergency Message: Editable template for a distress call (MAYDAY, PAN-PAN, SECURITÉ) via VHF radio.
Settings
From here you can customize and configure SailNav's behavior to perfectly fit your needs and those of your vessel.
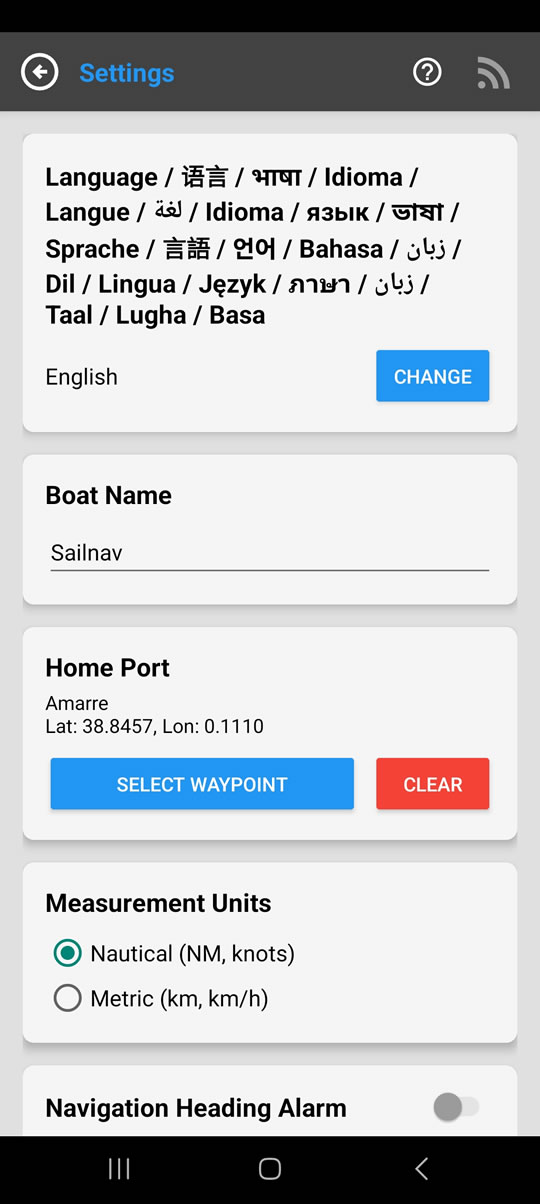
Configuration Options
- Language: Changes the language of the entire application.
- Screen Mode (Day/Night): Toggle between light and dark themes to improve visibility or reduce glare.
- Boat Name: Customize your vessel's name for logs.
- Fuel: Configure tank capacity and engine consumption curves.
- Home Port: Set your return point or usual base.
- Units of Measure: Select between Nautical system (miles, knots) or Metric (km, km/h).
- Voice Alarm Manager: Detailed configuration of audible alerts, anchor radius, and heading tolerance. See details below.
- Map Manager: Management of offline nautical charts. See details below.
- GPS Information: Satellite status and compass calibration. See details below.
Alarm and Voice Manager
This panel is SailNav's auditory control center. From here you can manage both critical safety alerts and configure a "virtual co-pilot" that announces the navigation data you are interested in.
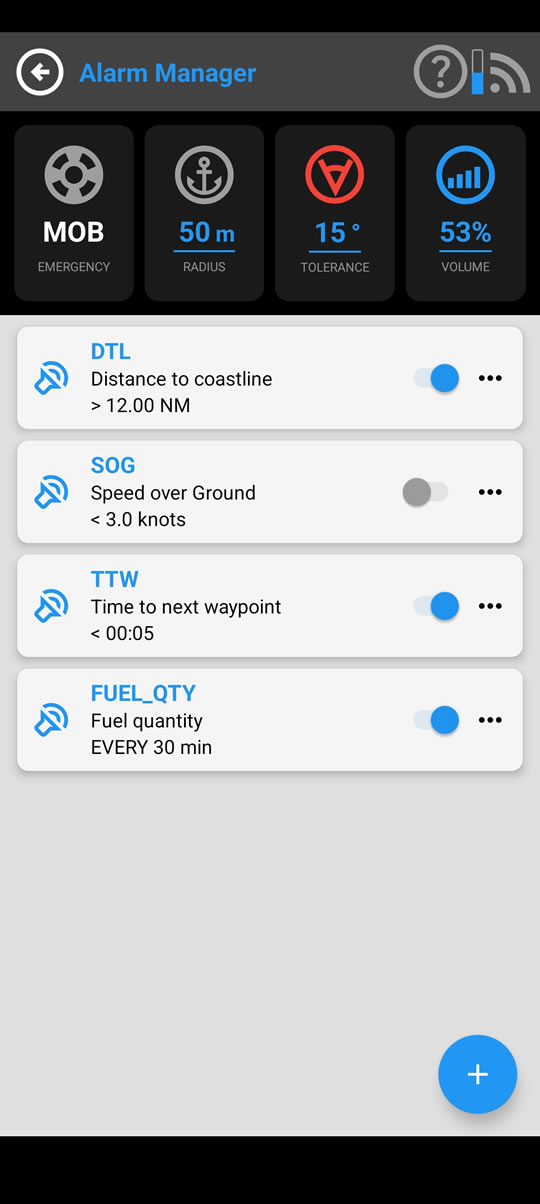
1. Main Alarms and Volume (Top Area)
At the top you will find four quick access cards:
- MOB (Emergency): Activates "Man Overboard" mode. A quick access button for critical situations.
- Anchor (Anchoring Alarm): Monitors if the boat drags. The blue number indicates the safety radius in meters. You must adjust this number based on your boat's length, depth, and chain let out. If you leave that radius, the alarm will sound.
- Heading (Steering Alarm): Helps you maintain heading on long voyages. The number indicates the tolerance in degrees. If your heading deviates to port or starboard beyond those degrees, the system will warn you.
- Volume: Controls the intensity of the app's alert sounds.
⚠️ IMPORTANT ABOUT VOLUME
The volume control on the screen adjusts only the App's audio output. To ensure you hear the alarms:
- Verify that the general media volume of your phone/tablet is at maximum.
- If you connect the device to the boat's speaker system (via Bluetooth or cable), ensure the stereo volume is up and the correct input is selected.
2. Personalized Voice Alerts (Bottom List)
The great advantage of this manager is its flexibility. By pressing the (+) button, you can create any type of alert using any metric available in the application.
The system works by selecting a metric and applying logic:
- Condition Alarms (Threshold): The system monitors data and warns you only if it crosses a dangerous limit.
Example: "Attention! Distance to Land (DTL) less than 1 Nautical Mile." Ideal for safety. - Recurrent Reports (Time): The system "calls out" data periodically without you having to look at the screen.
Example: "Speed (SOG): 5.5 knots"... (repeat every 2 minutes). Ideal for sail trimming or maintaining cruising speed.
This ability to combine multiple metrics and conditions turns SailNav into a proactive monitoring system, allowing you to navigate with your head up and aware of your surroundings.
Note: You can access this manager from the main Settings menu or by pressing directly on the alarm indicators in the top bar of the Instrument screens.
⚠️ DISCLAIMER: Although SailNav's alarm system is an excellent navigation aid, it should never replace human watchkeeping. Technical factors such as GPS signal loss, battery depletion, or poorly configured device volume can prevent its operation.
The skipper is solely and ultimately responsible for maintaining permanent visual and auditory watch, as well as ensuring the safety of the vessel and crew at all times.
Offline Map Manager - SailNav Map Server
SailNav is flexible and allows you to navigate with or without connection. There are 4 ways to manage cartography in the app:
- 1. Online Navigation: If you have an internet connection (mobile data), the map downloads and updates in real time as you move.
- 2. Cache Memory (Pre-loading): If while in port (with WiFi or coverage) you explore the area where you are going to navigate, those maps are temporarily saved in the "cache" memory. Later, on the high seas and without internet, you will be able to see those areas you previously visited.
- 3. Local Files: You can import your own map files downloaded externally.
- 4. SailNav Map Server: Download full map packages from our servers to ensure total independence from the internet.
The Map Manager focuses on these last two options, allowing you to manage physical files on your device to navigate with safety and total autonomy.
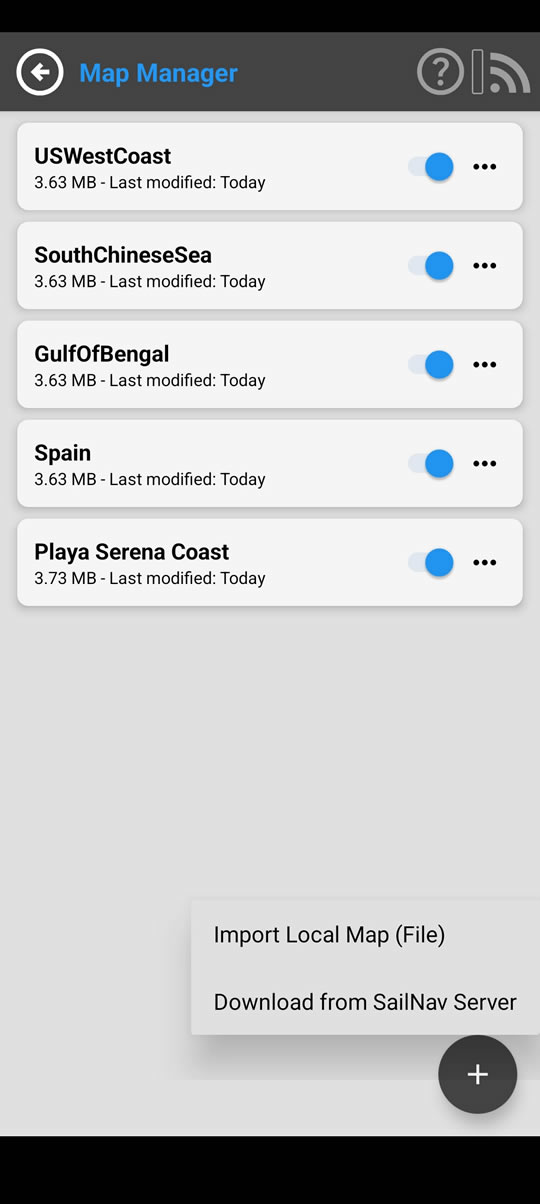
Add New Maps (+)
By pressing the floating button (+) in the bottom corner, you have two ways to get maps:
- Import Local Map (File): If you have obtained a compatible map on your own, use this option to install it from your phone's memory.
- Download from SailNav Server: Access the official SailNav repository. Here we provide maps for various zones of the world ready to download. This server is updated periodically improving the quality and quantity of the charts. Once downloaded, the map resides on your phone and needs no connection type to work.
Management: Activate, Edit and Delete
Once you have maps installed, they will appear in the manager list:
- Enable/Disable (Switch):
- Blue (ON): The map is active and visible.
- Gray (OFF): The map is installed but hidden.
Tip: It is not advisable to have several maps covering the same geographic area enabled simultaneously, as it may affect visibility and performance. Enable only the one you need.
- Options Menu (...): By pressing the three dots on each card, you can Edit the name of the map to better identify it or Delete it to free up space.
Visualization on the General Map
So you always know which areas you have covered "offline", SailNav draws guide boxes on the general navigation map (when at distant zoom levels):
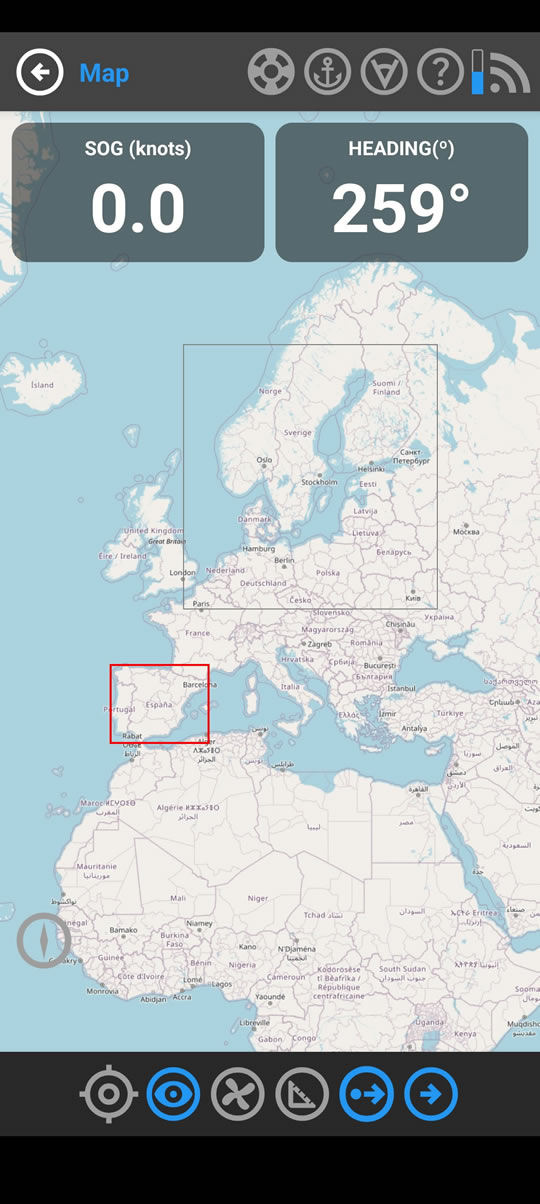
- Red Box: Indicates coverage of an offline map that is currently Enabled.
- Gray Box: Indicates the area of a map you have downloaded but is Disabled.
IMPORTANT - LEGAL NOTICE: Cartography provided by SailNav, whether online or offline, must be used exclusively as a navigation aid. These maps do not replace official nautical charts (paper or digital) required by local and international maritime authorities. Data accuracy is not guaranteed. The skipper is solely responsible for navigating with caution, verifying information with official sources, and ensuring the safety of the vessel.
GPS Info and Compass
This is the diagnostic panel for your device's sensors, useful for verifying GPS signal quality and compass calibration.

GPS Status
- Satellites (used / visible): The more satellites in use, the more accurate your position will be.
- Accuracy: The error margin of your position in meters (a low number is better).
Compass Status
If accuracy is low, the app will prompt you to calibrate the compass, usually by moving the phone in the air drawing a figure "8".
Buoys and Marks (IALA)
Buoys and marks are aids to navigation that signal channels, hazards, special zones, and safe water references. Their meaning is interpreted by shape, colors/bands, topmark (the figure at the top), and light characteristics (if they are lighted).
IALA Zones
The world is divided into two regions for lateral buoyage. The way port/starboard are interpreted changes between them (other types—cardinal, isolated danger, safe water, special—are common to both):
- Region A: Europe, Africa, most of Asia, Australia, and New Zealand — see Region A table.
- Region B: The Americas (North, Central, and South), Japan, Korea, Philippines — see Region B table.
Key difference in channel lateral marks: in Region A port = red, starboard = green; in Region B it is the opposite: port = green, starboard = red.
Main Types of Marks
- Lateral (channels): indicate the port/starboard side of the entrance channel.
- Cardinal: indicate the position of a hazard relative to the compass points (N, E, S, W).
- Isolated danger: a hazard surrounded by navigable water.
- Safe water: channel centerline / reference point; navigable water all around.
- Special: areas or purposes (reserves, anchoring, cables, regattas, etc.).
Lights are described with abbreviations (e.g., Fl flashing, Oc occulting, Q quick, etc.)
and patterns (colors/periods). The topmark reinforces the type (e.g., stacked cones for cardinal marks).
| IALA A Buoyage | |
|---|---|
| Signal | Meaning |
 |
Lateral Port (red, cylindrical/can shape): Leave the buoy to your port side when entering a port (upstream). |
 |
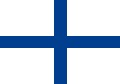
Lateral Starboard (green, conical shape): Leave the buoy to your starboard side when entering a port. |
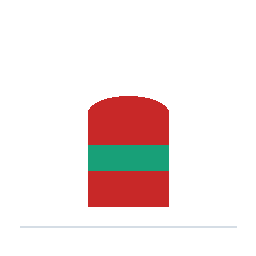 |
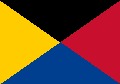
Bifurcation — preferred channel to starboard: Follow the starboard branch (red body with green band). |
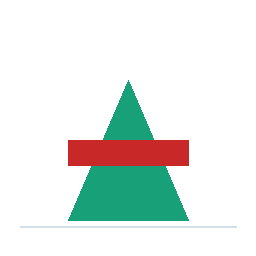 |
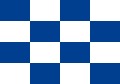
Bifurcation — preferred channel to port: Follow the port branch (green body with red band). |
 |
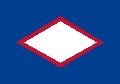
Safe Water: Channel center / fairway axis. Red/white vertical stripes; spherical topmark. |
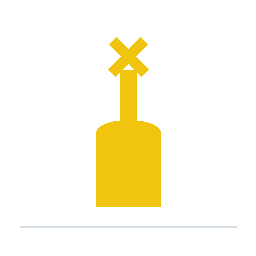 |
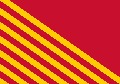
Special Mark (yellow): Special zones or purposes (anchoring, leisure channels, restrictions, etc.). |
 |
Isolated Danger: Localized obstacle; black colors with red band; two black spheres topmark. |
 |
North Cardinal: Black over yellow; topmark ↑ ↑. Pass to the North. |
 |
East Cardinal: Black-yellow-black; topmark ↑ ↓. Pass to the East. |
 |
South Cardinal: Yellow over black; topmark ↓ ↓. Pass to the South. |
 |
West Cardinal: Yellow-black-yellow; topmark ↓ ↑. Pass to the West. |
IALA Region B
In Region B lateral marks reverse colors compared to Region A: port = green, starboard = red. This applies to all of the Americas (North, Central, and South; Caribbean), as well as Japan, Korea, and the Philippines. If navigating outside these areas, consult Region A.
| IALA B Buoyage | |
|---|---|
| Signal | Meaning |
 |
Lateral Port (green, can): Leave the buoy to your port side when entering a port. |
 |
Lateral Starboard (red, conical): Leave the buoy to your starboard side when entering a port. |
 |
Bifurcation — preferred channel to starboard: Follow the starboard branch (red body with green band). |
 |
Bifurcation — preferred channel to port: Follow the port branch (green body with red band). |
|
Safe Water (red/white, sphere). Same in A and B. |
|
Special Mark (yellow). Same in A and B. |
|
Isolated Danger (black with red band, two spheres). Same in A and B. |
|
Cardinals N/E/S/W: Same in A and B (black/yellow colors and cone-shaped topmarks). |
Lighthouse Lights
On charts, each lighthouse has a coding that describes how it shines so it can be identified at night. The legend indicates the light type, color, period, and sometimes the height and range.
Typical format: Type (group) Color Period Height Range.
Example: Fl(3) W 10s 15m 12M = group of 3 flashes (Fl(3)), white (W),
10s period, 15m height, 12 miles range.
- Common Types:
Flflashing,LFllong flash,Ococculting,Isoisophase,Q/VQquick / very quick,MoMorse (e.g.,Mo(A)). - Colors:
Wwhite,Rred,Ggreen,Yyellow. - Sectors: on the chart you will see red/green/white arcs indicating where each color is visible from.
| Lighthouse Lights (Chart characteristics) | |
|---|---|
| Icon | Meaning |
 |
F (Fixed): continuous steady light. E.g.: F W (fixed white). |
 |
Fl (Flashing): brief duration of light, longer duration of darkness. E.g.: Fl W 5s. |
 |
LFl (Long Flashing): flash of ≥2 s. E.g.: LFl W 10s. |
 |
Oc (Occulting): duration of light longer than duration of darkness. E.g.: Oc G 6s. |
 |
Iso (Isophase): light and darkness durations are equal. E.g.: Iso Y 4s. |
 |
Q (Quick): rapid flashes (~1/s). VQ = very quick. |
 |
VQ (Very Quick): faster than Q. E.g.: VQ(3) 10s. |
 |
Fl(2): group of 2 flashes per period. E.g.: Fl(2) W 10s. |
 |
Fl(3): group of 3 flashes per period. E.g.: Fl(3) W 15s. |
 |
Mo(A): Morse code for the indicated letter. E.g.: Mo(A) W 6s. |
 |
WRG Sectors: different colors depending on your bearing (W=white, R=red, G=green). E.g.: Fl WRG 10s. |
Sectors: many lighthouses show R/G/W sectors with specific bearings/angles. Charts show colored fans with limits in true degrees.
Chart Symbols
Quick reference based on INT/INT1 (IHO) symbology. Styles may vary slightly depending on the publisher. On Spanish charts, soundings are usually in meters with decimals.
Soundings and Seabed
| Icon | Meaning |
|---|---|
| Sounding (depth) — in meters (e.g., 7.4 m). On some old charts: feet/fathoms. | |
| Depth contour/isobath — line of equal depth (label in meters). | |
| Nature of the seabed — abbreviations: S (sand), M (mud), R (rock), Sh (shells), G (gravel), Co (coral), St (stones). |
Hazards and Obstructions
| Icon | Meaning |
|---|---|
| Rock awash (hazard at the surface). | |
| Submerged rock with known depth (e.g., 2.1 m). | |
| Dangerous wreck — not covered, or covered by little water (check sounding label if available). | |
| Obstruction / Doubtful sounding — generic symbol when the exact nature is unknown. | |
| Submarine Pipeline/Cable — avoid anchoring or trawling. |
Navigation Aids (Symbols)
| Icon | Meaning |
|---|---|
| Lighthouse (may include light sectors). | |
Light notation — Fl(3) 10s 15m 12M = group of 3 flashes every 10 s,
15 m height above datum, 12 miles range.
|
|
| Leading line / Range — line to be aligned with marks to follow a safe course. | |
| Isolated Danger — marked with an isolated danger mark; navigable water all around. | |
| Safe Water — mark indicating navigable water in all sectors. |
Zones and Restrictions
| Icon | Meaning |
|---|---|
| Prohibited/Restricted Area — do not enter (consult legend/NOTMAR for details). | |
| Anchoring Zone — permitted/limited according to label. | |
| Outfall/Pipe — zone to avoid (no anchoring or trawling fishing). |
Currents and Tides
| Icon | Meaning |
|---|---|
| Current — direction (true) and speed in kn (sometimes indexed by tide hours). | |
| Tides (References) — points with height/schedule data (see chart notes and tide tables). |
Suggestion: combine this section with IALA Buoys and Lighthouse Lights. For recent changes: check Notices to Mariners (NOTMAR).
Ship Navigation Lights
Navigation lights allow you to see and be seen, and to identify the type and relative heading of a vessel between sunset and sunrise, or in restricted visibility.
Basic Set (according to COLREG):
- Masthead light — white,
225°sector forward (112.5° each side). Only for power-driven vessels. - Sidelights — red to port and green to starboard,
112.5°sector each (visible from the front to 22.5° abaft the beam). - Stern light — white,
135°sector aft. - All-round light — light visible through
360°(white/red/green/yellow depending on the case).
Common Cases:
- Sailing vessel (under sail only): only sidelights + stern. Optional tricolor light at the masthead (boats < 20 m) or separate red/green + white stern lights.
- Sailing vessel under power: considered power-driven ⇒ add masthead light (and in daytime, a "cone apex down").
- Towing: yellow stern light in addition to the white one; additional lights according to tow length.
- Fishing/Trawling: combinations “red over white” / “green over white” (depending on gear) + sidelights/ stern.
- Not Under Command (NUC): red over red (360°) + sidelights/stern if making way.
- Restricted in Ability to Maneuver (RAM): red-white-red (360°).
- Pilot vessel: white over red (360°).
Light ranges vary with length (e.g., < 12 m ≈ 2–3 M; longer vessels have longer range). Lighthouse sectors are shown on charts; on vessels, sectors are fixed by regulations.
| Navigation Lights – Ships (COLREG) | |
|---|---|
| Icon | Meaning |
 |
Masthead (white, 225°) — forward light visible up to 22.5° abaft the beam on each side. |
| Port Sidelight (red, 112.5°). | |
| Starboard Sidelight (green, 112.5°). | |
| Stern Light (white, 135°). | |
| All-round (360° white): anchored (<50 m: 1 forward; ≥50 m: 1 forward + 1 aft lower). | |
|
|
Not Under Command (NUC): two all-round red lights (if making way, also sidelights/stern). |
|
|
Restricted in Ability to Maneuver (RAM): red / white / red all-round (plus specific lights if applicable). |
|
|
Constrained by Draught (CBD, >50 m): three all-round red lights. |
|
|
Trawler: green over white all-round (sidelights/stern if making way). |
|
|
Fishing (not trawling): red over white all-round (sidelights/stern if making way). |
|
|
Pilot: white over red all-round (plus underway lights if applicable). |
|
|
Towing: yellow stern light (135°) above the white stern light; tow masthead lights (2–3 white) depending on length. |
Day Shapes
Black figures displayed during daylight to indicate the vessel's status (daytime equivalent of many night lights). Actual sizes and positions vary with length; shown schematically here.
| Signal | Meaning |
|---|---|
| Anchored — 1 ball forward. | |
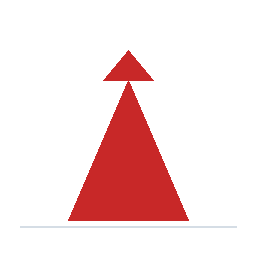
| Aground — 3 balls in a vertical line. | |
| Not Under Command (NUC) — 2 balls vertical. | |
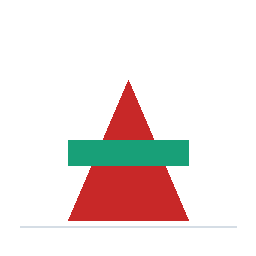
| Restricted in Ability to Maneuver (RAM) — ball–diamond–ball. | |
| Constrained by Draught (CBD) — 1 cylinder. | |
| Fishing (gear restricting maneuver) — 2 cones with apexes together. | |
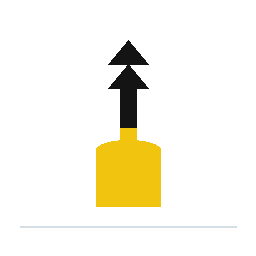
| Under sail with engine running — 1 cone with apex downwards. | |
| Towing with tow length ≥ 200 m — 1 diamond (the towed object, if possible, also at its end). | |
| Dredging or Obstruction works — Side not clear: 2 balls. | |
| Dredging works — Clear side: 2 diamonds. | |
| Mine clearance — 3 balls in a triangle (stay well clear). |
Note: In dredging works, both sides are shown (2 balls = side not clear, 2 diamonds = clear side). The use of these signals depends on the activity and vessel size (see COLREG Rules 27–30).
Maneuvers and Privileges (COLREG)
General Order of Priority Between Vessels
- Not Under Command (NUC)
- Restricted in Ability to Maneuver (RAM)
- Constrained by Draught (CBD)
- Fishing (with gear limiting maneuver)
- Sailing (when not using engine)
- Power-driven
- Seaplanes / WIG
- Overtaking: the overtaker always gives way (Rule 13).
- Narrow channel (Rule 9): do not impede vessels that can only navigate within the channel.
- TSS (Rule 10): do not impede transit; cross at a proper angle.
- Anchored/aground: not a “privilege” but a warning; give wide berth.
- In addition to the above priorities, when two vessels are in sight of each other:
Visual convention:
green = stand-on vessel;
red = give-way vessel.
Your boat is always drawn facing up.
| Icon | Description |
|---|---|
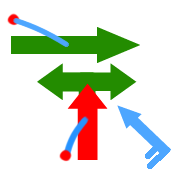
 |
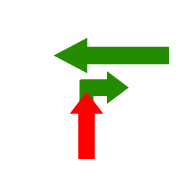
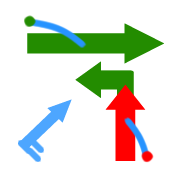
Power-driven — head-on situation Both shall alter course to starboard to pass on each other's port side. |
 |
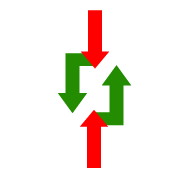
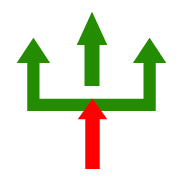
Power-driven — crossing (the other on your starboard) You give way: alter course to starboard and pass astern. (Rule 15) |
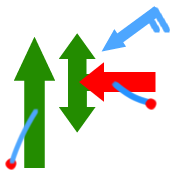
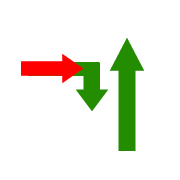 |
Power-driven — crossing (the other on your port) You stand on; the other gives way to starboard and passes astern. |
 |
Power-driven — overtaking The overtaker always gives way, with a safe and clear maneuver. (Rule 13) |
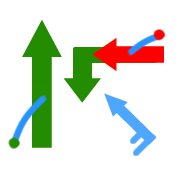 |
Sail vs sail — opposite tacks I have priority. The vessel on port tack gives way (I receive wind from starboard). (Rule 12) |
 |
Sail vs sail — opposite tacks I do not have priority. The vessel on port tack gives way (I receive wind from port). (Rule 12) |
 |
Sail vs sail — same tack I have priority. The windward vessel gives way to the leeward vessel. I am to leeward. (Rule 12) |
 |
Sail vs sail — same tack I do not have priority. The windward vessel gives way to the leeward vessel. I am to windward. (Rule 12) |
Sound Signals at Sea
Convention: • = short blast (~1 s) / — = prolonged blast (4–6 s).
| Signal | Meaning / Use |
|---|---|
| Maneuvering Signals in Sight (Rule 34) | |
| • | I am altering my course to starboard. |
| •• | I am altering my course to port. |
| ••• | I am operating astern propulsion. |
| ••••• (or more, short blasts) | Doubt / Immediate danger. I do not understand your maneuver or believe there is a collision risk. |
| — (at bends or fairways) | Warning in local restricted visibility (e.g., entering a bend/arm of the sea). |
| — — • (channel: intention to overtake on starboard) | Narrow Channel (34.c): “I intend to overtake you on your starboard side”. Response if in agreement: — • — •. |
| — — • • (channel: intention to overtake on port) | Narrow Channel (34.c): “I intend to overtake you on your port side”. Response if in agreement: — • — •. |
| Restricted Visibility (Rule 35) | |
| — (every ≤ 2 min) | Power-driven vessel making way (underway). |
| — — (every ≤ 2 min) | Power-driven vessel underway but stopped (not making way). |
| — • • (every ≤ 2 min) | Vessel not power-driven making way (sail), fishing, restricted maneuver, not under command, or towing. |
| — • • • (every ≤ 2 min) | Vessel towed with crew on board (if possible), following the tug's signal. |
| ••••• (extra bell) | Pilot vessel on duty: may add ••••• in addition to the above signals. |
| Anchored / Aground (Rule 35 & 30) | |
| Bell 5 s (every ≤ 1 min) | Anchored < 100 m: rapid ringing of the bell for 5 s forward. |
| Bell 5 s + Gong 5 s | Anchored ≥ 100 m: bell forward and gong aft, both ~5 s. |
| Bell 3 strikes + 5 s + 3 strikes | Aground: before and after the 5 s rapid bell ring, give three distinct strokes. |
| — (in addition to bell) | Anchored (optional): one prolonged blast to warn approaching vessels. |
Note: overtaking in a channel signals (— — • / — — • • / response — • — •) apply according to Rule 34(c) of International Regulations. Local variations may exist in inland waterways.
Flags on Board (ICS + Etiquette)
In addition to the International Code of Signals (ICS) flags for messages —see table A–Z and 0–9—, vessels use national, courtesy, and club/owner flags with internationally standardized positions and sizes.
Order and Position
- National Ensign: at the stern (stern staff). It is the ship's primary flag.
- Courtesy Flag: of the country being visited, at the starboard spreader of the mast.
- Club Burgee: at the masthead (if length and instrumentation allow) or at the port spreader.
- “Q” Flag (yellow): upon entering a country before customs clearance, at the starboard spreader until formalities are completed.
On motorboats without a mast, the ensign at the stern and others on an auxiliary staff according to vessel layout.
Approximate Sizes
- Ensign: height ≈ 1/40–1/50 of the length (LOA). E.g.: 10 m boat → ~20–25 cm high ensign (2:3 or 3:5 proportion depending on country).
- Courtesy: slightly smaller than the ensign (≈ 70–80% of its height).
- Burgee/Club: small size, triangular/rectangular depending on club design.
When in doubt, use the rule of thumb: the ensign should be visible and proportionate without “dragging”.
- Flying Times: usually from sunrise to sunset (in port, ceremonial hoisting/lowering at local times).
- Respect: avoid faded/torn flags; do not fly multiple national ensigns at once.
| Flag | Meaning |
|---|---|
 |
A (Alpha): I have a diver down; keep well clear at slow speed. |
 |
B (Bravo): I am taking in, or discharging, or carrying dangerous goods (explosives). |
 |
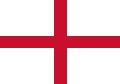
C (Charlie): Yes / Affirmative. |
 |
D (Delta): Keep clear of me; I am maneuvering with difficulty. |
 |
E (Echo): I am altering my course to starboard. |
 |
F (Foxtrot): I am disabled; communicate with me. |
 |
G (Golf): I require a pilot. |
 |
H (Hotel): I have a pilot on board. |
 |
I (India): I am altering my course to port. |
 |
J (Juliet): I am on fire and have dangerous cargo on board: keep well clear of me. (Commonly used for drifting). |
 |
K (Kilo): I wish to communicate with you. |
 |
L (Lima): You should stop your vessel instantly. |
 |
M (Mike): My vessel is stopped and making no way through the water. |
 |
N (November): No / Negative. |
 |
O (Oscar): Man overboard. |
 |
P (Papa): All persons should report on board as the vessel is about to proceed to sea (in port). |
 |
Q (Quebec): My vessel is healthy and I request free pratique. |
 |
R (Romeo): Received. |
 |
S (Sierra): I am operating astern propulsion. |
 |
T (Tango): Keep clear of me; I am engaged in pair trawling. |
 |
U (Uniform): You are running into danger. |
 |
V (Victor): I require assistance. |
 |
W (Whiskey): I require medical assistance. |
 |
X (X-ray): Stop carrying out your intentions and watch for my signals. |
 |
Y (Yankee): I am dragging my anchor. |
 |
Z (Zulu): I require a tug. (Fishing: I am shooting nets.) |
 |
0: Numeral zero. |
 |
1: Numeral one. |
 |
2: Numeral two. |
 |
3: Numeral three. |
 |
4: Numeral four. |
 |
5: Numeral five. |
 |
6: Numeral six. |
 |
7: Numeral seven. |
 |
8: Numeral eight. |
 |
9: Numeral nine. |
Morse Code (International)
Morse represents letters and numbers with dots (·) and dashes (—).
Rhythm: dot = 1 unit, dash = 3, space between signals of a letter = 1,
between letters = 3, between words = 7. SOS is written together: ···———···.
| Letters A–Z | |
|---|---|
| Letter | Code |
| A | · — |
| B | — · · · |
| C | — · — · |
| D | — · · |
| E | · |
| F | · · — · |
| G | — — · |
| H | · · · · |
| I | · · |
| J | · — — — |
| K | — · — |
| L | · — · · |
| M | — — |
| N | — · |
| O | — — — |
| P | · — — · |
| Q | — — · — |
| R | · — · |
| S | · · · |
| T | — |
| U | · · — |
| V | · · · — |
| W | · — — |
| X | — · · — |
| Y | — · — — |
| Z | — — · · |
| Numbers | |
|---|---|
| Number | Code |
| 0 | — — — — — |
| 1 | · — — — — |
| 2 | · · — — — |
| 3 | · · · — — |
| 4 | · · · · — |
| 5 | · · · · · |
| 6 | — · · · · |
| 7 | — — · · · |
| 8 | — — — · · |
| 9 | — — — — · |
| Signs (frequent) | |
|---|---|
| Sign | Code |
| . | · — · — · — |
| , | — — · · — — |
| ? | · · — — · · |
| / | — · · — · |
| = | — · · · — |
| + | · — · — · |
| - | — · · · · — |
| " | · — · · — · |
| @ | · — — · — · |
Wind – Beaufort Scale
The Beaufort scale classifies wind intensity by its effects on the sea and surface. Useful conversion: 1 kn = 1.852 km/h.
| Force | Description | Wind | Sea State (approx) |
|---|---|---|---|
| 0 | Calm | kn: 0 km/h: 0 |
Sea like a mirror |
| 1 | Light air | kn: 1–3 km/h: 2–5 |
Ripples barely visible |
| 2 | Light breeze | kn: 4–6 km/h: 7–11 |
Small wavelets, crests do not break |
| 3 | Gentle breeze | kn: 7–10 km/h: 13–19 |
Large wavelets, crests begin to break |
| 4 | Moderate breeze | kn: 11–16 km/h: 20–30 |
Small waves; frequent white horses |
| 5 | Fresh breeze | kn: 17–21 km/h: 31–39 |
Moderate waves; some spray |
| 6 | Strong breeze | kn: 22–27 km/h: 41–50 |
Large waves; white foam crests everywhere |
| 7 | Near gale | kn: 28–33 km/h: 52–61 |
Sea heaps up; white foam streaks |
| 8 | Gale | kn: 34–40 km/h: 63–74 |
Moderately high waves; crests break into spindrift |
| 9 | Strong gale | kn: 41–47 km/h: 76–87 |
High waves; spray affects visibility |
| 10 | Storm | kn: 48–55 km/h: 89–102 |
Very high waves; sea surface white with foam |
| 11 | Violent storm | kn: 56–63 km/h: 104–117 |
Exceptionally high waves; intense spray |
| 12 | Hurricane | kn: ≥ 64 km/h: ≥ 118 |
Air filled with foam and spray; sea completely white |
Common rounded ranges. Sea state also depends on fetch, current, and bathymetry.